Author Archives: Krista Salmon

03.05.12

Target: Hits the Spot.

I know, I know, Target is nothing new, but honestly I had fallen out of love with  the Tar-zhay that had always been a mecca for me.  Well, last week my love was rekindled.  Not only was it filled with a ton of gorgeous home goods and baubles, but I found so much design inspiration.  (Check out the colorway in these adorable gift bags!)
Knock off “lacquer” boxes.

Foo Dogs anyone?

Love this.  

Gold chevron storage boxes.

Great baskets!

Loving these snakeskin boxes.

Some gold paint and these would be stunners!

Pretty.

This would make a great end table.

Beautiful color.

J’adore this serving tray.

Corals and navy…  the wheels in my head are going a mile a minute.

Lastly, I couldn’t resist two of these for my best girls.

03.01.12

4 Little Ghosts.

I LUST after these lucite stools from CB2.  I hunted them down after seeing them in this kitchen.
That being said, they were a little to big for my kitchen, and my budget.
We have a small galley between our kitchen island and our refrigerator.   But the girls love to cook with me and get tired of standing on step stools.
 So, I found the perfect acrylic stools to fit my kitchen and my budget.  ($199.95 for two!)
To upholster or not to upholster, that is the question.

02.29.12

Native Shop Giveaway.

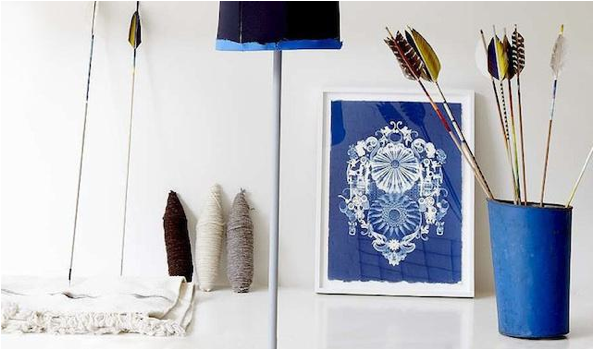
Lately I am loving the look of decorative arrows. 

And now this look is looking even more attractive thanks to Stacey at the Native Shop.
 Stacey is offering a $20 gift towards any purchase in her store to one lucky Kiki’s List follower.  

Here are the rules for the contest: 
1.) You must be a follower of Kiki’s List.  If you are not sure how to follow, click here.
2.) To enter the giveaway, leave a comment in the comment section of this post between today, Wednesday, February 29 and Friday, March 2.  A winner will randomly be selected.

3.) Each of the following are worth an additional entry:

• Share a link to this post on Facebook.  Leave an additional comment on this post, letting me know that you have done so (include link.)
•  If you have a blog, share a link to this post.  Leave an additional comment on this post, letting me know that you have done so (include link.)

•  Tweet about this giveaway.  Leave an additional comment on this post, letting me know that you have done so (include link.)

• “Like” Native on Facebook.  Leave an additional comment on this post, letting me know that you have done so.
• Follow Native Shop on Twitter.    Leave an additional comment on this post, letting me know that you have done so.

02.28.12

Ikea Rast to Dorothy Draper.

I had been searching for the perfect side tables for our living room for what seems like forever.  I saw a few Rast DIY’s on various blogs and figured if I couldn’t buy them, I’d make them.  Much to Mike’s dismay, this was a project that I (ahem) we were going to take on.  These tables were a true labor of love.

 I thought it would be easy, but it took many weekends and trips to Home Depot.   Here’s what we started with: two Ikea Rast Dressers  (At $34.99 the price can’t be beat!)

 and a cart full of spray paint.  That little spray grip was a lifesaver, because I practically went through every last can of spray paint that you see below.
 Here is the how-to.  You may want to eliminate some of these steps and learn from my mistakes.
1.) Assemble the bases, but not the drawers (or have your husband do it while he is watching football.)
2) Spray on on two coats of primer.  BE SURE TO SAND THOROUGHLY between coats. (I wish I had)  I recommend sanding blocks versus sandpaper for this one.
3.) I sprayed on a lacquer and I am not sure if it was the fact that it was 20 degrees outside, or that the lacquer wasn’t cutting it (see those spots?) After six cans of black lacquer I had to switch gears.
4.)  After a SERIOUS sanding, I repainted everything with a black oil-based polyurethane.  I used a roller to apply it.  Polyurethane takes at least 12 hours to dry.  I gave it 2 days.  (Helpful hint: Skip the lacquer paint and go right to this step.)

5.) Next I Sanded and painted my O’verlays with Krylon Gold Spray paint. I love the rose-gold undertones in that paint.  I also used that paint for my Intaglio frames in the dining room.   I let them dry for a day and sealed with a clear lacquer.

6.) Attempted to assemble the dressers.  Mike had to bail me out on this one.

7.) Installed 12 of this brass hardware. (Burnished Bronze, 51 mm x 43 mm)
8.) Super glued the O’verlays on as well as a few of my fingers together.

And here is the final result:

Recognize that lamp?  Next week I will post how I gave it a make-over in 20 minutes.