Category Archives: Artwork

09.12.11

Baby G’s ABC’s.

This is Rachel.  She is expecting a baby boy next month
Remember that post about ABC’s?
Well I am happy to report that Rachel has received and hung letters for her baby boy’s nursery, and couldn’t be happier!  She was able to customize her letters, and the quality is great.  Here they are in all of their glory:
Buy them here.

07.12.11

Ch-Ch-Ch-Ch-Ch-Ch-Ch-Changes.

If you don’t know by now, our house is in a constant state of “progress.”  It drives my poor husband crazy.  We have made some progress on little Lou’s room.  Here are some sneak peaks of the work in progress.

When I originally had the nursery painted six years ago, I had my amazingly talented artist Corinne Marlowe paint this Lion over the changing table and a laurel wreath around her chandelier.  (More of Corinne’s work on our house to come.) As you can see the big girl bed takes up a bit more room than a crib. 

That changing table has now been converted into a dresser, and between the new bed and the shelves that we were installing, the dresser had to be moved a few inches to the left.  Here’s the problem with that: 
As much as it killed me to paint over that little lion, he had to go.  Now the question was, what to put in his place.  I knew I wanted a mirror, but couldn’t find anything that was better than what I had in my head… so I took matters into my own hands.
 I found this guy at Home Goods.  On clearance for $25.
I primed him,

Painted him,
and had a mirror cut for inside.

I should also mention that Corinne replaced the laurel wreath with stripes on the ceiling.  
 Love them.

(I was actually in her closet taking this picture… You can see the door on the side.)
The left shelving unit is lacking as you can see.  We added more drawers to the shelving units than I expected, so I am waiting on more bin pulls. I would also like to work on the styling of the lefthand shelves.
Next up:  Pillows, pictures and a new chandelier!  Stay tuned.

06.29.11

The Zhush.

Sue De Chiara of The Zhush is certainly no stranger to style.  Just check out these pics of her beautiful home.

This lawyer turned blogger has decided to share her sense of style with all of us, through her online store.  If you haven’t checked it out, you must.  Not that you would need any more incentive to shop at The Zhush, but Sue is offering all Kiki’s List Followers 10% off with the code kiki10.  This special offer is good through July 6. Here are some of my favorite items:
Happy Shopping!

06.24.11

ABC’s.

Hanging wall letters are seen in virtually every nursery out there.  There is something so exciting about boasting your child’s very existence.  I had both of my girls names on the wall in the nursery before either of them were born.  There is a fine line between stylish and gaudy when displaying your child’s name.  There are so many fonts and patterns out there that are just too “cutesy” for my taste.  
Here are some that I absolutely loved:

Moss letters.  How different!
Pink and green, but not overboard.  (I would 86 the bows.)

Burlap– fantastic!
 So many things you can do with these.
 Trends are moving away from stopping at just a name.  I am working with a friend on an adorable boy’s nursery that will have these on the wall:
You can even customize your letters.
Something a little more subtle.
Which one is your favorite?

06.21.11

My Very Own Butterfly Collection.

If you have been reading this blog for sometime, you are well aware of my love of butterflies.  You may also have known that I was working on a wall of butterflies for my (work in progress) living room.  Well, here they are:
 While I wanted a wall of butterflies, the whole idea of dead specimens creeped me out.. and ….. I wouldn’t want any of these beautiful creatures killed for my benefit.  Beleive it or not, these little guys are cut out of plastic.
After a long deliberation, I decided to arrange them by color.
I inherited this piano from my parents, and they inherited from my grandmother.  I took lessons on it as a little girl, and soon, E will be too.  We plan to move the piano on the wall to the left, and put these two chairs under the butterflies once they are reupolstered in turquoise linen.
They were so easy to put together… Here’s all it took:
6 of these cases from Michaels (I got them 50% off.)  They have a great grey linen backing.
16 Butterflies in each color.
And last but certainly not least, my trusty glue gun.
Because the cases are an irregular size I had to get custom mats.  I love the way the black inner mat finishes everything off.
And I also love that I now have my own collection of butterflies, and that not one single butterfly was harmed in the process.

05.11.11

Intaglios.

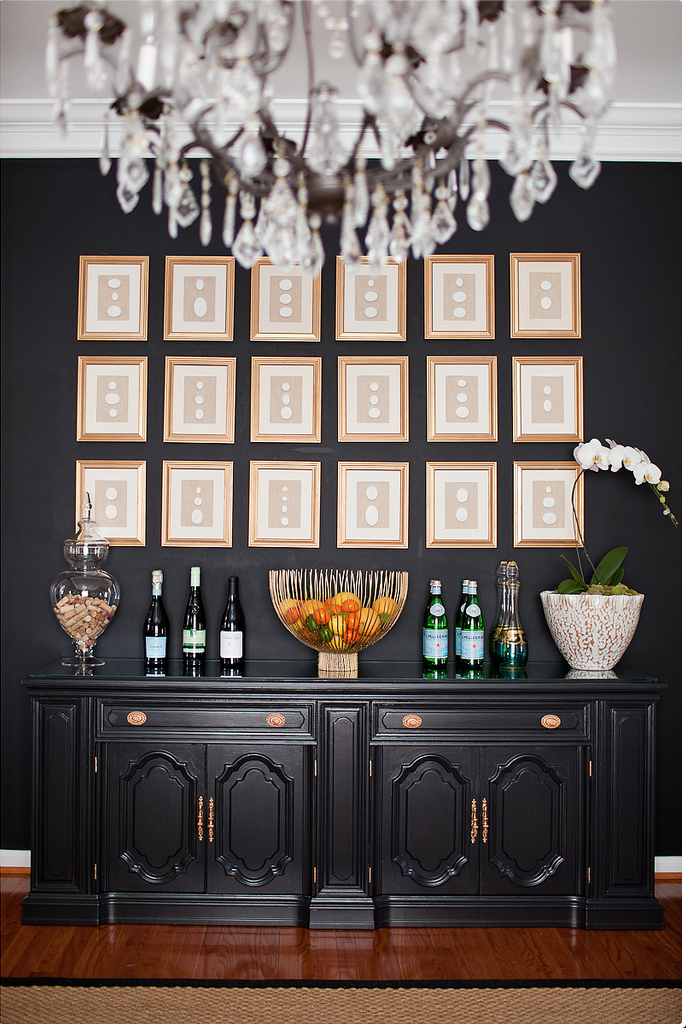
Last week I received the latest Ballard Designs Catalog and my jaw almost dropped when I saw this wall of cameos.  These little pictures are selling for $299 PER picture!  The timing couldn’t have been more perfect because I just finished a wall of 18 for under $200.  And here’s how….
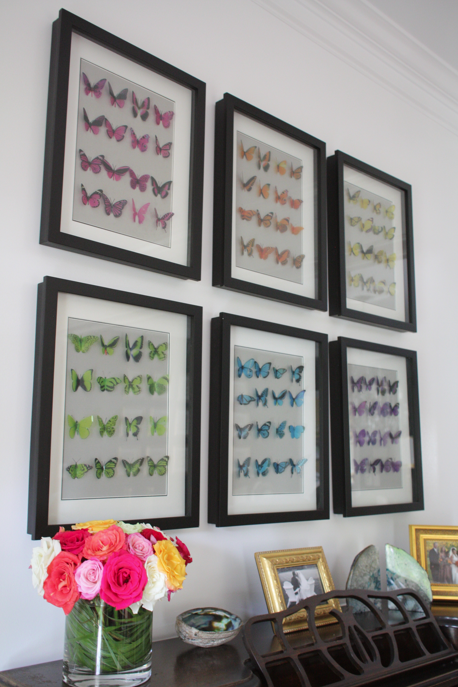
I am notorious for buying items for my next big project and storing them for months if not years before I get to it.  But let’s be honest, with two kids, a full time job and this little blog– I don’t get a lot of spare time for crafting.   That being said, I bought these 
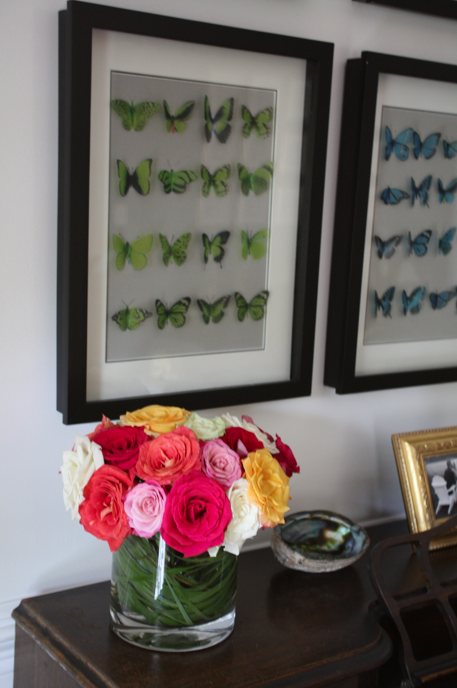
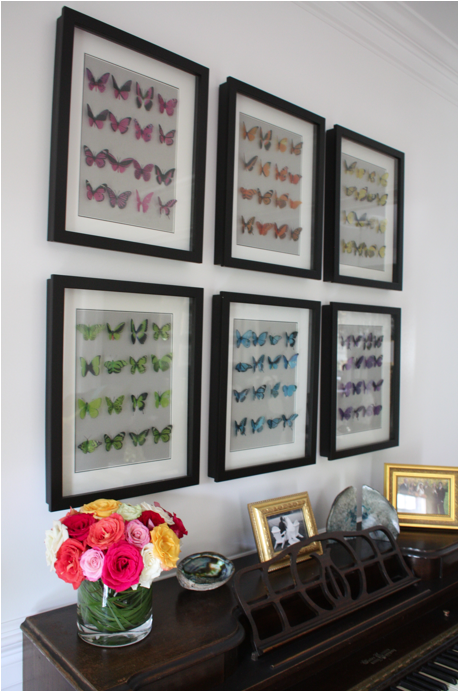
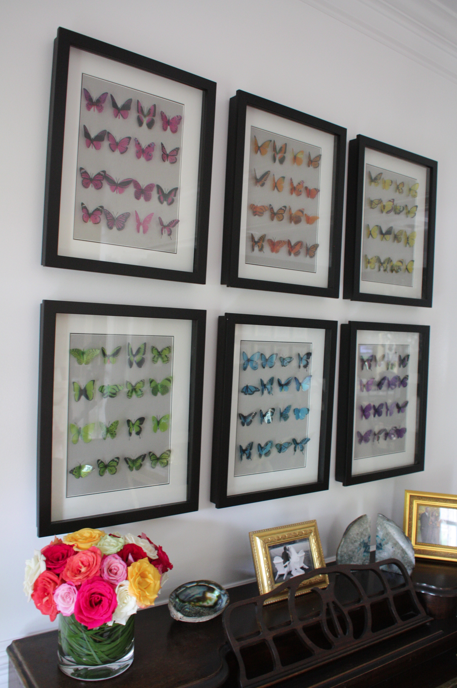
intaglios over a year ago for the wall in my dining room.  Well, bit by bit, I worked on this project and was able to finish just in time before Lou’s party.  Here are the results:

Here’s the cost break down:

Here’s the how-to:

18 Frames…..
I actually made mine without the glass.  The intaglios were thicker than I expected, so the frames weren’t thick enough for the glass.
 Some spray paint….
 Presto-chango:
I bought this fabric at G-Street Fabrics thinking I’d use the velvet side… but I couldn’t get rid of these darn lines…
So, I decided to use the reverse side, which I now love… it looks like linen, but it’s much more substantial.
 I traced all 18 backboards (fabric backside up) and cut them out.
I used my little craft glue gun to glue the fabric to the cardboard.  One note– make sure to pull the fabric tight to each corner and cut off the excess.  The fabric will stretch.
Then I glued on the intaglios and voila!
Now, with all of that procrastination, the hardest part was actually hanging them.  Thanks to my Pops, who painstakingly hung all 18.  Because the frames were incredibly cheap, the hooks were not evenly attached, so we used double sided velcro tape, which allows me to rearrange them as I choose.
I am so happy with the results!
 
Tutorials are not my thing– but I hope you enjoyed it… Please send me pictures if any of you decide to do your own wall of intaglios!
UPDATE:
Intaglios  |  Kiki's List
See how we updated our dining room here + here.