Category Archives: diy

04.06.11

Turning A House Into A Home.

Our house is a typical builder’s grade house. When we originally moved here in 2004, we thought that we would live here a few years and eventually move “up.”  However, we love our house, we love our neighborhood and our neighbors.  One thing I didn’t love- our kitchen.  I will never forget the day of our walk-though. I walked into the kitchen and started bawling my eyes out because I hated the countertops (and really, the whole kitchen.)  My mother (God rest her soul) who was also my Realtor told me to suck it up, that we can always change the counters.   It seemed so wasteful getting rid of them because they were granite.  Albeit ugly granite, but granite nonetheless.
(Image from previous owners, 2003)

The thing that drives my husband crazy (okay, one of the things) about me is that our house is in a constant state of change.   He has come home from a business trip and I will have literally painted an entire room a different color.  I’d like to think it keeps things interesting, he would tell you differently.

Because we decided that we were going to be here for some time we (okay I) started designing to turn this house into a home.   It ended up being more “changes” than Mike signed up for.  We ended up editing a little more than just the countertops.  Most of the major was done work in November of 2009, and while it is not completely finished, I am finally willing to show you some “tweener” shots. (Thanks to Ryann Laden for the pictures)   Here are the results thus far:

Our cabinets were in perfectly good shape, I just hated the color.  So- we painted them.  We built a bulkhead to get rid of that awkward space in between the cabinets and the ceiling.  We also had extra room so we built in some shelving on the end of the island and the lower cabinets.  This has opened up our kitchen so much.  I am so in love with the boards that we had installed on the ceiling.  It wasn’t cheap, but I think it adds so much character to the space.
 Next to the sink we moved two sets of cabinets up to the ceiling and added a cafe shelf.
  We replaced all of the hardware with Gilmore knobs and pulls from Restoration Hardware.
We chose a honed Carrera, which I know is very popular, but it was just a natural fit for the space.
Ahh… My favorite part:  my new apron sink.  I like to call it my double-wide. This was something that I went back and forth on for weeks, and it actually held up the process because I decided at the last minute that I couldn’t live without it- and boy, am I that glad I did.  We had to replace the cabinet under the sink with a smaller one, and that cabinet took about 6 weeks to come in.  Then we had to have the painter come back and paint it (he had already painted the existing cabinet.)
In a few weeks my Imperial Trellis roman shades will be hung.  Again, seems quite predictable, but the color way is so perfect in my kitchen. I tried so many others and none were quite this perfect.
So there you have it- our almost-done kitchen.  I couldn’t be happier with the results and am so happy to come home to it.  The best part?  On Christmas morning last year, Mike looked around and said “Honey, I really love our kitchen. ”  RIP ugly countertops!
  Stay tuned for the exciting changes to our living room, dining room and family room!

03.30.11

Such Is My Life.

For some reason, as luck would have it, whenever I get something new that I am really excited about, disaster strikes.  I get a new car, it gets scratched. I bought a new pair of earrings out in LA, they were stolen out of my luggage. The list of terrible, horrible, no good, very bad things goes on and on.  
This little baby was no exception.
A few months ago, I bought this rug on Overstock.com for our foyer.

 I had a brilliant idea to have it monogrammed to spruce it up.

(Nobody’s fault, just coincidence) No more than 3 minutes after laying it down, Mike and our friend Dave wheeled an 800 lb. TV that we were getting rid of RIGHT THROUGH THE MIDDLE OF MY RUG.  Argh!  I just about died.  Here are the results.

\
People tell me that the lines will “work themselves out.”  Does anybody have any suggestions?

03.09.11

Martha and the Beach.

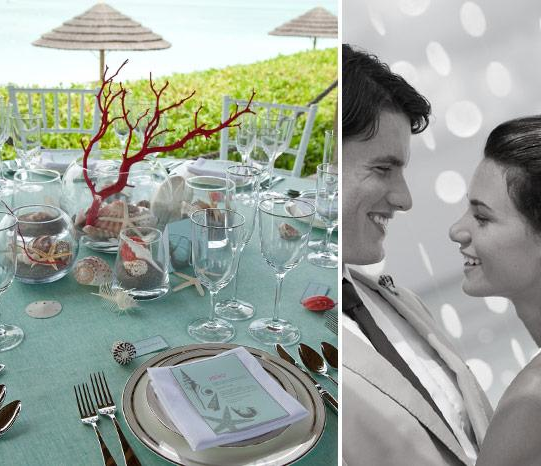
Upon our suggestion, our next door neighbors jetted off to Beaches, Turks and Caicos this week.  (Can you say JEALOUS?) Which got me thinking about what wonderful memories we’ve had there.  Last year, Mike and E surprised me with a little “Wedding” where we renewed our vows.  What a great day we had.  Those two planned the whole thing, and I was shocked at how well-planned and elegant everything was.  Then I realized that they got by with a little help from the Queen of Crafts.
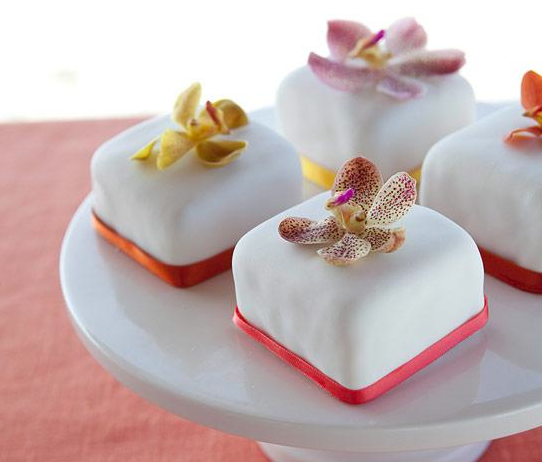
 Beaches is now partnering up with Martha Stewart Weddings.  It’s like a wedding in a box, but one that even this “Type A” could go for.  There are six wedding packages to choose from, or you can customize.  I am super impressed with the stylish options that they have for weddings- and all you have to do is show up.
Bon Voyage!

03.03.11

Firetruck Party

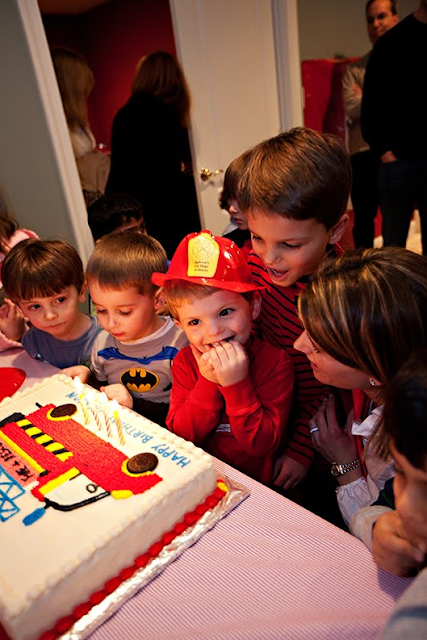
A few months ago, my friend Kristin Mika asked me to help her coordinate her son Jackson’s 4th birthday party.  The theme: Firetrucks.  I was thrilled to help as I don’t get to plan many boy’s parties.
Kristin had a good idea in her head as to what she wanted, just needed some help editing.  We did things like design tags, pick fonts, fabrics and talked through the flow of the party and where everything should go.  I also helped with her with some ideas to keep the kiddos entertained like “Pin the Tail on the Dalmation” , “Hot Dalmation” (like Hot Potato.)


Here are some of the concepts that we discussed:

1.) “Pin the tail on the Dalmation” game. (Image by HPD.)
3.) Firefighter hats-  I would rip off the stickers, or try to get them plain and put your custom stickers on them.
4.) Large dalmatian to have at the party.
5.) Custom Popcorn Cups (Cups from Michael’s, Stickers HPD)
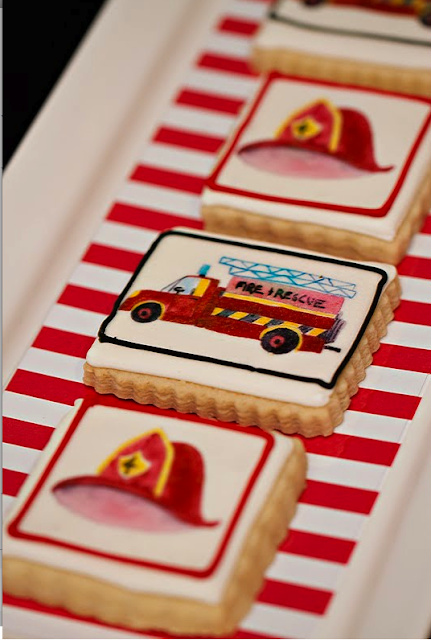
9.) Custom cookies and tags wrapped with  dalmatian or red grossgrain ribbon
10.) Custom candy tags and cupcake toppers with images from HPD.
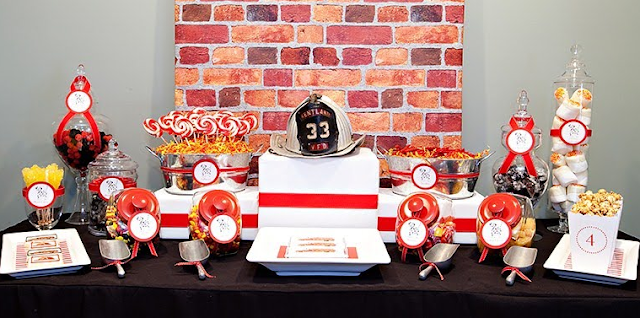
Another friend, Kristy Patterson  (I know, it gets confusing Krista, Kristin and Kristy..) designed the candy table.  We designed the layout and the tags for the candy.  While I was not there the day of the party, it was a great success!  Here are the final results, pictures taken by James Woo:

I hope this was inspiration for those of you who may be in the market for a Firetruck Party.  I had so much fun with Kristin and Kristy planning the event.  If you need customized invites, labels or gifts, call Kristin… if you are looking for an amazing candy table, Kristy is your girl.

12.29.10

Not Your Ordinary Holiday.

I think most of you know by now that I love a good bargain. Well, as most of us do before the holidays, I had been running around like a chicken with my head cut off, and realized in the 11th hour that my table clothes were uber-boring and had minor stains.

I went to the fabric store for another project and found this fabric in the remnants pile for $5/yd. I loved how unexpected the grey and cream would be. I bought some red grosgrain ribbon to add around the hem to make it a bit more festive. After going to several cleaners and receiving quotes as high as $80 to hem two tablecloths, I decided 1.) I need a sewing machine and 2.) how much I love my mother-in-law. Since she was here without her sewing machine, I bought some no-sew hem tape and Grammy attached the ribbon on Christmas Eve morning and had it at the house just in the nick of time to set the table.

I didn’t have time to go to the flower market, so I used a mixture of whatever I could scoop up from Wegman’s and Costco. I added cranberries to the vases of all of the arrangement for a festive touch.
.
I love the look of fresh fruit in floral arrangement. Just buy a pack of wooden skewers and pop the fruit on top.

Our monogrammed china.

My Christmas color palette is red, cream and apple green. It goes so well with my decor.

Remember these vases? They were reused here.
.

I used pomegranates as place card holders. Not only is it my favorite fruit, but it has significant religious meaning and is thought to bring good luck.

12.23.10

Tags, Tags and More Tags.


I was introduced to Courtney Fernan through Kristen Krason at 6th Street Design School. Courtney is the author of A Thoughtful Place blog where she dishes out creative ways to make your house a home on a budget. I hopped over there last week and saw this post on gift labels, which inherently brought me over to Jones Design Company. Check out these labels that Emily created for all of her readers as a holiday gift. What a great idea! I of course printed some out and slapped them on the wine bottles that I will be giving my co-workers.

Happy downloading…. Thanks Emily!

12.23.10

Those Flowers.

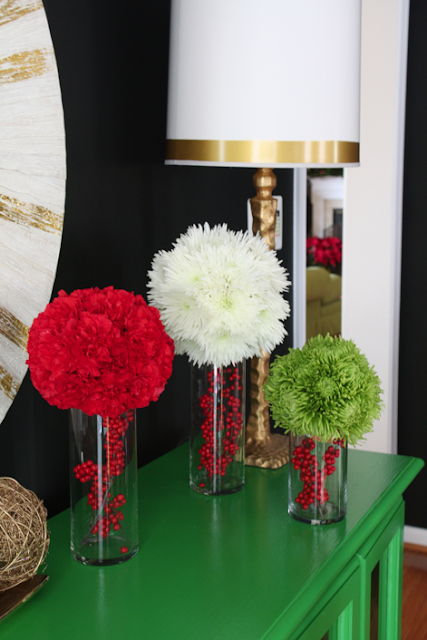
Remember those flowers from this post? Want to learn how to make them? They were super easy, and inexpensive too!

Every year for Christmas the Ya’s (minus our dear Claudia who lives in North Carolina) and I get together and try to do something fun together rather than getting each other gifts. This year, it was a floral design class at Helen Olivia. Located in Old Town, Alexandria, Helen Olivia is offers premier floral design to many clients and just recently outfitted the Residence of the Vice President for Christmas.

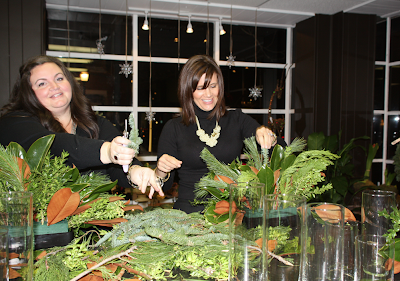
MJ and I hard at work on our mantle pieces.

Danielle and Lissy showcasing their carnations.

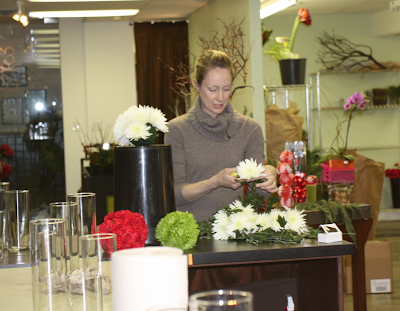
Arranging my mantle piece….There are so many things wrong about this picture (like the sprouting of my double chin)… I cannot wait to cleanse!


Marianne Raub, the owner offers many classes to meet the desires and skill sets of many aspiring floral designers. This week’s class was focused on Christmas. We made a mantle piece as well as the pomanders that you saw on my green console.


I must admit, when we walked up and saw the collection of carnations and mums, I was quite skeptical. But how adorable did these turn out?


Here’s how to do it:

1.) Buy 24 of each flower, three oasis balls and 3 vases of your choice. I found that the carnations worked far better than the mums. I would also suggest roses, however, it will be much more expensive.
2.) Soak Oasis Balls in water for 30 minutes.
3.) Cut each stem about 1/4 of an inch from the base. Always cut stems at an angle to maximize water absorption.
4. )Starting at the top of the oasis ball, push stem into oasis, making sure that the base of the flower is touching the foam.
5.) Continue to fill oasis ball with flowers tightly. You will have about a 2 inch portion of oasis that is uncovered, but that will be where you rest the pomander on the vase. It will not be seen.
5.) Fill vase with objects that you have chosen- Christmas balls, winter berries, candy canes– you name it.
6.) Place pomander on vase and enjoy– these should last up to a week.