Category Archives: diy

09.18.12

E-Fest Hangover.

Man, did we have a blast last weekend!  It all started on Friday with E’s treats for her school celebration.
Saturday the birthday girl woke up at 6:30 am declaring “E-Fest has begun!”
And was promptly served her dream breakfast of bacon & donuts.

Then we spent the morning decorating the house.
And this twelve passenger van for the party of E’s dreams.  Pics to come next week!

08.15.12

Wrap it Up.

Ever since painting our hutch in the foyer red, I have felt like it was missing something.  I was looking for the perfect fabric to back the shelves with.  I now believe that perfect fabric does not exist.  I did however have a few sheets of this decorative paper in the basement.  I thought I’d give it a try.
Because the back of the hutch is not flat, I wrapped foam board pieces in the paper.

And voila!

More pics to come once I finish styling!

06.26.12

‘Round Here.

I have been wrestling with the layout of our living room for years.  We’ve moved the sofa on every wall in the room.  Last weekend we rearranged the furniture once again to incorporate a buffet that I got on clearance at HomeGoods.  Interestingly enough, now the sofa is not up against any wall, and we used the buffet as a sofa table that is adjacent to the front door.  I LOVE how it opens up the entire room.  

 Now I will need to work on centering the butterfly prints and find some new items to style those DD Tables.  E actually styled them here… not so bad, eh?  The most exciting part?  I have saved my pennies and the wingback chairs are FINALLY going out for reupholstery in two weeks.  H E L L O   T U R Q U O I S E   L I N E N.   They are seriously the best buy I’ve ever made on Craig’s List-  so comfortable!  We are loving this new setup and spent more time in our living room last weekend than we have in the entire eight years we’ve lived here.  Lou has even set up her own restaurant.  (Can you see Rudolph above?  He was her first customer.)  She’s been getting great use out of our new ottomans!

For those of you who have followed the progress of this room, you are probably asking where my DIY lamps are… No fear, they have been repurposed in the foyer.
I just love repurposing items in our house to new spaces… It almost makes me feel like I got away with something! 

06.20.12

A Fresh Perspective.

I bought this secretary’s desk a few months ago on CraigList.  Mike had to pick it up for me and when he got it home it was covered in scratches and top spindle fell off.   I paid about $200 and, I was then convinced that I was a sucker.   (Sorry, the only picture that I have is from the actual CL posting.)
I was determined to turn this piece of trash into a treasure.  And finally, I found my inspiration via Pinterest.
It was the perfect color composition for the palette that I selected for our guest bedroom.
Here she is.. all prettied up.
 The interior is Autumn Red by Benjamin Moore and the exterior is Blackthorn by Duron.
More pics and resources on this room to come!

06.19.12

My Top 10 Floral Design Tips.

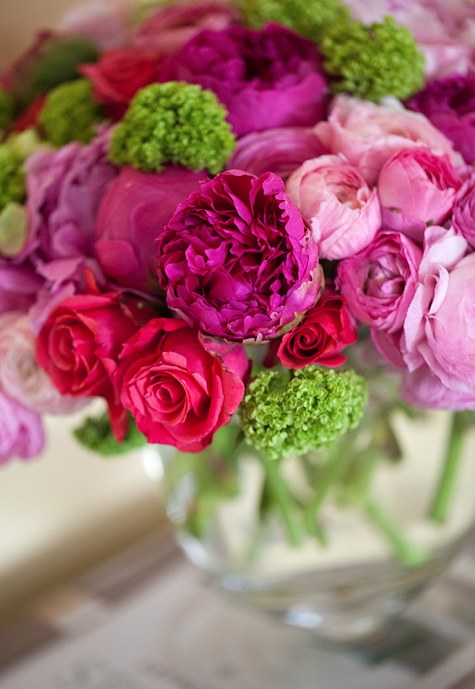
Many people have asked me about my floral designs.  YES, I created them, YES, they are store bought flowers and YES you can do it too!  Flowers are one of my favorite ways to treat myself.  I am so happy when they are in my home.   You can fill your home with beautiful flowers as well (and not pay top dollar at a florist.) Here are my top 10 tips for creating beautiful arrangements:

1.) Be Random.  Turn on some music and let the flowers go where they will.  If you focus too much on patterns, it will end up looking like something from FTD.
2.) Clean Your Stems.  #1 Rule for a compact arrangement.  Make sure to pull of all leaves, thorns and excess limbs.  Not only will this detract from your arrangement, it will take up extra space not to mention make the water uber-slimy.
 3.) Cut Your Stems As You Go.  You will need to vary the length of your stems with the tallest stems being in the center and gradually shorter stems towards the base of the vase. Cut flowers longer than you think you will need, you can always cut them shorter.  As I mentioned above, you will have the tallest stems in the center of the arrangement.
4.) Forget The Packets.  Just change the water after two days.  Most flower arrangements will last you up to a full week. Put them somewhere you can enjoy them.
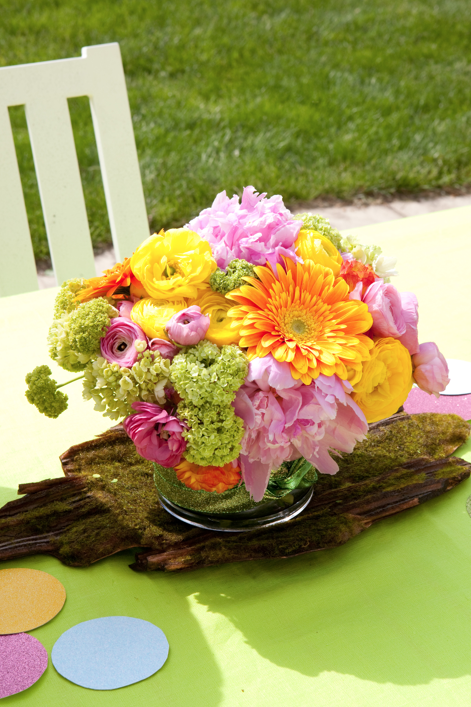
5.) Arrange in Odd Numbers.  While you want your design to tailored, believe it or not, an odd number of large blooms will create more of a balance.
6.) Get Creative With Your Fillers.  Steer clear of most of the fillers you get at the store.  Think outside the box; fruit, berries, cabbage heads, bear grass and hydrangea leaves are some of my favorites.
7.) Don’t Be Afraid of Carnations Anymore. (Just be cautious, there are some really tacky carnations out there.) There are many more varieties of carnations these days.  They can look quite stunning and can be a cost-effective alternative to roses.  I would not use them for a party in the evening, but they are perfect for a casual, daytime soiree.
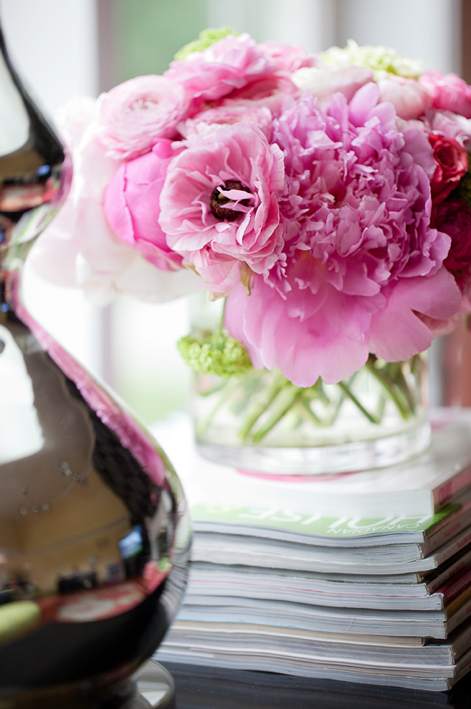
8.) Open Up Your Flowers.  Roses are the most specific example that I can use here.  When you buy them, generally, they are closed up tight.  Carefully glide your finger along the perimeter (starting on the outside petals) of the rose and gently open it.  Move from one petal to the next like a maze.
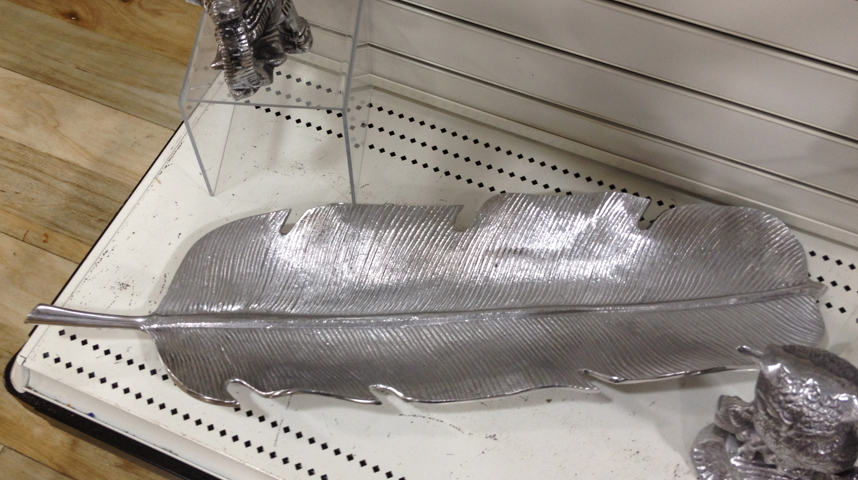
9.) Always Be On The Lookout For Great Containers.  Michaels and HomeGoods are great places to find unusual containers.  I also love looking around my house and rediscovering something that I thought I had.

10.) Practice, Practice, Practice.  You will get better with each arrangement you create!

05.22.12

From Blah to BAM!

Let me take you through the transformation of a cabinet….
This picture is just plain embarrassing.. We used to use this in our family room to store our baby arsenal of diapers, wipes and burp cloths.  I actually took these photos three years ago because I was going to sell it on Craig’s List.
as you can see, it was distressed..
I decided to give her one more chance, so we moved it to the foyer as a catch all for everything that comes into our house.  Chinese Red was the color that came to mind.  It was really hard finding the perfect red.  It turned out to be Red Geranium by Glidden.  (That’s the sample smack dab in the middle.)
I painted on a sample to make sure it was just the right color.
And it was!  I removed the starbursts from the existing draw pulls and spray painted all of the hardware in Rustoleum Brass spray paint. As you can see, this needs more styling and I still need touch up some areas but nonetheless I am super happy with the results.  It brings a smile to my face every day when I walk in the door.
Last image taken by Ryann Colleen Photography