Category Archives: diy

05.16.12

Lou’s 4th Birthday.

This year, Lou wanted a Strawberry Shortcake theme.. So I went with it.  I tried to incorporate as many tasteful strawberries as possible, but the overall theme tying everything together was pink.  Perfect for a party full of four-year-old girls.  We had such a fun time!
Photography- Ryann Colleen
Invitations- Belly Bean Cards
Marshmallows- One More Bite
Ombre Ruffled Table Cloth- Gravina Sisters
Strawberry Sunglasses-MakesParties.com
Strawberry Boxes- Simple Tastes
Strawberry Jewelry- Similar found here
Strawberry Shirt- Lemon Lime Babies
Strawberry Piñata– Shindigz

04.19.12

Strawberry Hills.

It’s hard to beleive that my baby is turning 4 on May 1.  This year (of course, after ordering a ton of invites, etc) in an effort to prevent me from having a nervous breakdown, we have decided to scale down and are just having a few little girls.  She chose Strawberry Shortcake as her theme.  I opted out of making the cards myself this year (Remember this post on balance?) and ordered these invitations from Belly Bean Cards.  I  have had them sitting on my desk for probably two months, and finally sent them out last week.  Aren’t they adorbs?
I did line some envelopes from Paper-Source to spruce them up a bit.  It’s easy!  Learn how to here.  The colors were a perfect match.

03.14.12

O’verlays Giveaway.

Cheryle Rhuda and Danika Herrick were friends who saw a common an overlap in their interior design businesses; a lack on interesting materials to refurbish furniture.  The two have built an empire off of DIYer’s and their desire to champagne quality furniture on a beer budget.  Just look at some of these amazing furniture transformations that were created with O’verlays.

After this post about O’verlays, I had to try them for myself.  Here is the result:
Cheryle and Danika are graciously giving away six Anne O’verlays to one lucky Kiki’s List Follower so that you can get this look for yourself.  All you need is one Ikea Rast dresser and whatever paint colors meet your fancy.  The possibilities are endless!
Here are the rules for the contest: 
1.) You must be a follower of Kiki’s List.  If you are not sure how to follow, click here.
2.) To enter the giveaway, leave a comment in the comment section of this post between today, Wednesday, March 14 and Friday, March 16.  A winner will randomly be selected.

3.) Each of the following are worth an additional entry:

• Share a link to this post on Facebook.  Leave an additional comment on this post, letting me know that you have done so (include link.)

•  If you have a blog, share a link to this post.  Leave an additional comment on this post, letting me know that you have done so (include link.)

•  Tweet about this giveaway.  Leave an additional comment on this post, letting me know that you have done so (include link.)

• “Like” O’verlays on Facebook.  Leave an additional comment on this post, letting me know that you have done so. 


• Follow O’verlays on Twitter.    Leave an additional comment on this post, letting me know that you have done so.


03.07.12

My Living Room Lamps.

As many of you saw in my Living Room Project mood board, I was planning for something like these Westwood Gold Lamps for my new Rast end tables.  
But at $318 each, I think Mike would have a seizure. So, here’s how I got the look for MUCH less.  Remember these cable knit lamps from HomeGoods?
Well, obviously, I spray painted them. 
 I had to stray from my go-to which is Krylon’s Gold to Rustolium’s Brass to match the gold foil on the new shades I ordered.
As you can see these new black shades were bigger than the old navy ones
so I had to buy new harps too.  The old shades were two inches shorter than the new, so I increased the harp size from 8″ to 10″.
and voila!  I put them back together and couldn’t be happier with the final result.  And at $170 for both lamps versus the $636 that I would have paid for the Westwood lamps, I think Mike couldn’t be happier either!

02.28.12

Ikea Rast to Dorothy Draper.

I had been searching for the perfect side tables for our living room for what seems like forever.  I saw a few Rast DIY’s on various blogs and figured if I couldn’t buy them, I’d make them.  Much to Mike’s dismay, this was a project that I (ahem) we were going to take on.  These tables were a true labor of love.

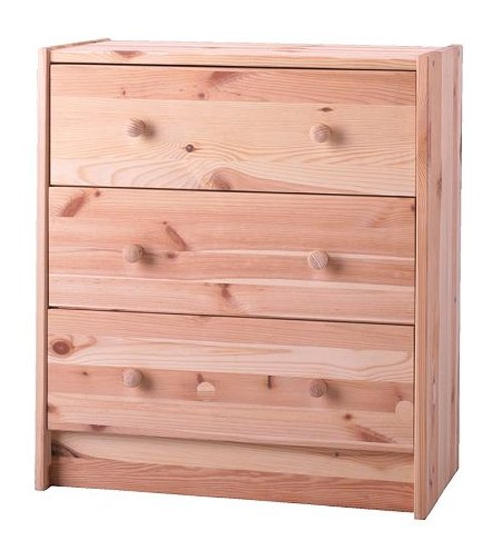
 I thought it would be easy, but it took many weekends and trips to Home Depot.   Here’s what we started with: two Ikea Rast Dressers  (At $34.99 the price can’t be beat!)

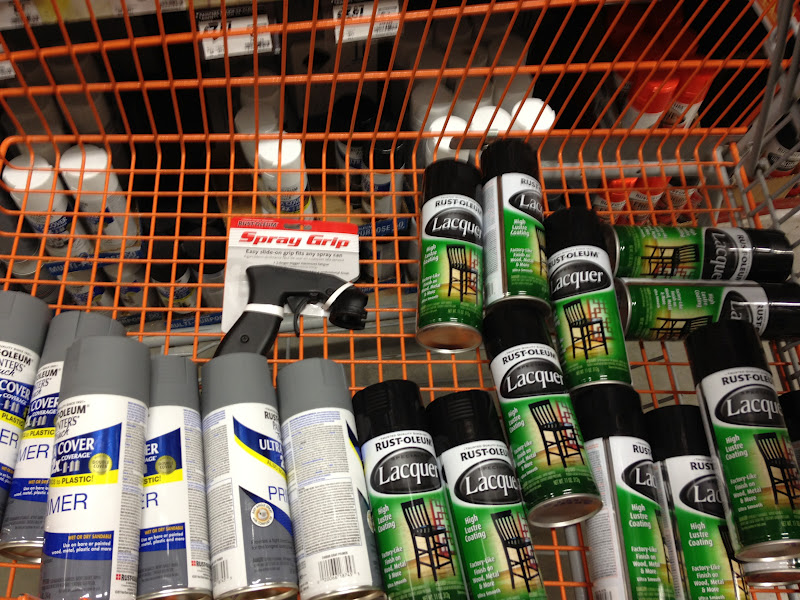
 and a cart full of spray paint.  That little spray grip was a lifesaver, because I practically went through every last can of spray paint that you see below.
 Here is the how-to.  You may want to eliminate some of these steps and learn from my mistakes.
1.) Assemble the bases, but not the drawers (or have your husband do it while he is watching football.)
2) Spray on on two coats of primer.  BE SURE TO SAND THOROUGHLY between coats. (I wish I had)  I recommend sanding blocks versus sandpaper for this one.
3.) I sprayed on a lacquer and I am not sure if it was the fact that it was 20 degrees outside, or that the lacquer wasn’t cutting it (see those spots?) After six cans of black lacquer I had to switch gears.
4.)  After a SERIOUS sanding, I repainted everything with a black oil-based polyurethane.  I used a roller to apply it.  Polyurethane takes at least 12 hours to dry.  I gave it 2 days.  (Helpful hint: Skip the lacquer paint and go right to this step.)

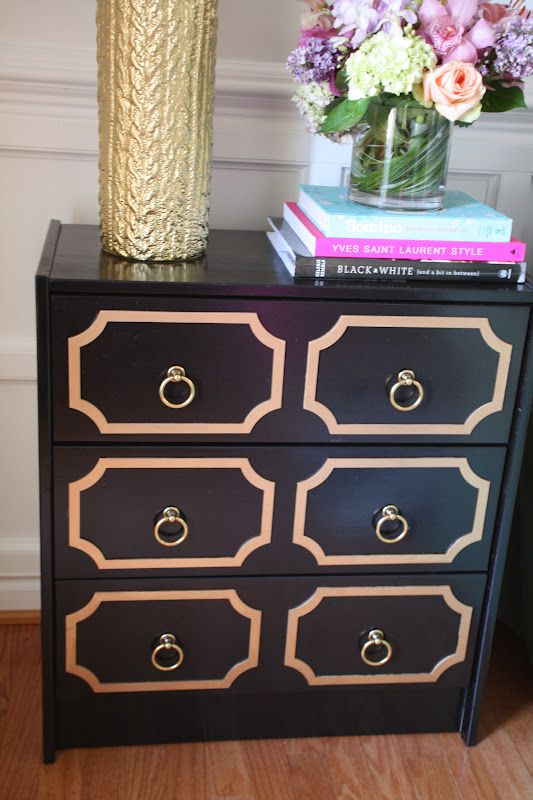
5.) Next I Sanded and painted my O’verlays with Krylon Gold Spray paint. I love the rose-gold undertones in that paint.  I also used that paint for my Intaglio frames in the dining room.   I let them dry for a day and sealed with a clear lacquer.

6.) Attempted to assemble the dressers.  Mike had to bail me out on this one.

7.) Installed 12 of this brass hardware. (Burnished Bronze, 51 mm x 43 mm)
8.) Super glued the O’verlays on as well as a few of my fingers together.

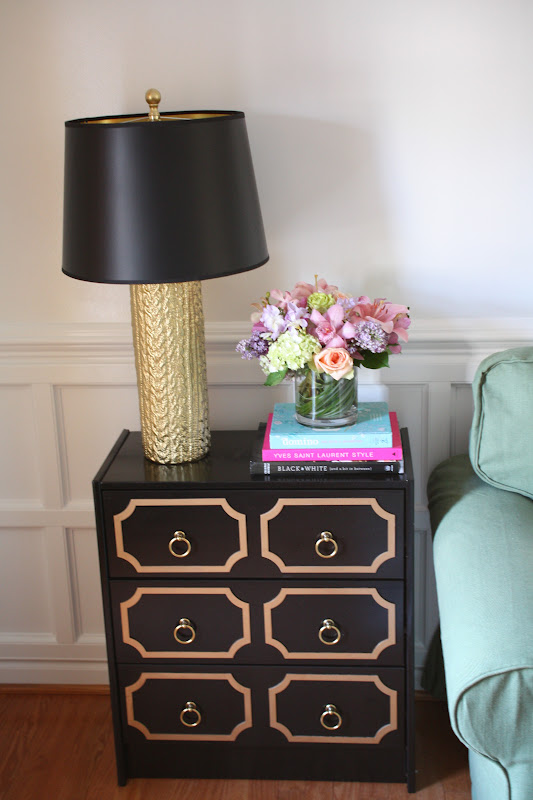
And here is the final result:

Recognize that lamp?  Next week I will post how I gave it a make-over in 20 minutes.

02.16.12

A Composition of Perfection.

Every Mom loves to hang onto the pieces of artwork that their child creates.  I keep mine on a bulletin board in our craft room.  But now with two kids and 10 collective years of artwork, I am having a hard time displaying it all.  Well, I have just found what I want for Mother’s Day.
Jan Eleni is a New York based designer who will create a Guggenheim-worthy collage of your child’s artwork.  Eleni offers two options for collages: a hand-cut collection of archival-quality images that are professionally framed (prices start at $3,800), or a less- expensive option of a printed custom collage (prices starting at $950.)

Not sure if this is in the budget for this Mother’s Day…. I am feeling a new DIY project coming my way!