Category Archives: Ikea

02.28.12

Ikea Rast to Dorothy Draper.

I had been searching for the perfect side tables for our living room for what seems like forever.  I saw a few Rast DIY’s on various blogs and figured if I couldn’t buy them, I’d make them.  Much to Mike’s dismay, this was a project that I (ahem) we were going to take on.  These tables were a true labor of love.

 I thought it would be easy, but it took many weekends and trips to Home Depot.   Here’s what we started with: two Ikea Rast Dressers  (At $34.99 the price can’t be beat!)

 and a cart full of spray paint.  That little spray grip was a lifesaver, because I practically went through every last can of spray paint that you see below.
 Here is the how-to.  You may want to eliminate some of these steps and learn from my mistakes.
1.) Assemble the bases, but not the drawers (or have your husband do it while he is watching football.)
2) Spray on on two coats of primer.  BE SURE TO SAND THOROUGHLY between coats. (I wish I had)  I recommend sanding blocks versus sandpaper for this one.
3.) I sprayed on a lacquer and I am not sure if it was the fact that it was 20 degrees outside, or that the lacquer wasn’t cutting it (see those spots?) After six cans of black lacquer I had to switch gears.
4.)  After a SERIOUS sanding, I repainted everything with a black oil-based polyurethane.  I used a roller to apply it.  Polyurethane takes at least 12 hours to dry.  I gave it 2 days.  (Helpful hint: Skip the lacquer paint and go right to this step.)

5.) Next I Sanded and painted my O’verlays with Krylon Gold Spray paint. I love the rose-gold undertones in that paint.  I also used that paint for my Intaglio frames in the dining room.   I let them dry for a day and sealed with a clear lacquer.

6.) Attempted to assemble the dressers.  Mike had to bail me out on this one.

7.) Installed 12 of this brass hardware. (Burnished Bronze, 51 mm x 43 mm)
8.) Super glued the O’verlays on as well as a few of my fingers together.

And here is the final result:

Recognize that lamp?  Next week I will post how I gave it a make-over in 20 minutes.

02.06.12

DIY Rast Project Update.

I received many emails about my little project in the garage.  Here is the current status.
With a little help from my friends at Duron, I sanded those babies down and applied a few thin coats of oil-based polyurethane.  I think it may have done the trick.  The down side is that it takes FOREVER to dry.  If you try this project yourself, here are a few tips:
1.) Make sure that you sand in between coats… I learned that the hard way.
2.) Prime it, spray one coat of spray paint to build a base, then roll on the next layer of paint.
3.) Don’t do this project when it is 26 degrees outside.
As you can see my O’verlays arrived and they were much thinner than I expected, but I think that will be a good thing.  Also, I was under the impression that they were wood… Not the case.  They are more like a waxy foam board material.
I sanded them down (on top of our trashcan, I was running out of space another reason to wait until Spring!)
Then I sprayed them with a metallic gold paint. I love Krylon.
And now it’s all drying. Tonight I will assemble them.
Stay tuned for the big reveal!

01.23.12

A Spotty Weekend.

Our living room is virtually empty after Craig’s Listers came and bought our old furniture.

I have spent the last two weekends working on a pair of  DIY Rast dressers for the living room.  After buying a cart full of paint and primer at the Depot, it was time to get started.

See that little Spray Grip in the cart?  Best $2.95 I ever spent.  Last weekend was all about priming.

Every.  Little.  Piece.
This weekend, I froze my a$$ off painting them in the garage.  I hope it wasn’t all in vein.  Due to the cold temperatures, I am afraid the paint job is a little spotty. They still need a few more coats, but I either need to wait until it warms up or get an industrial space heater.  The paint should dry clear and smooth in warmer temperatures.  Keeping my fingers crossed on that one.

In happier news, I received my agate magnets that were on backorder since Christmas.  I can’t wait to show you all what I have in store for them!

11.22.11

One Hell of an Ikea Hacker.

Upon perusing one of my favorite sites-Ikea Hackers,  I came across two of the best Ikea Hacks I have ever seen.  They both just happen to be from Erin at A Charming Nest.  Let’s take a look at the first hack.
What was once two RAST tables are now gorgeous bedside tables:
And if that wasn’t amazing enough, look at what she did with two HEMNES consoles!
Can you say A-MAZ-ING???
Thanks for the inspiration, Erin… Can’t wait to see what you do next!

10.27.11

Basement Design Process.

Last week after tweeting about having to replace the floors in our basement (our sump pump broke) I received an email from a reader asking to show pictures of our basement.  Well, I have never really shown you our basement because the project is essentially on hold until we save up enough money to really do it right.  We are slowly working on it.  With that said, I do have enough snapshots to show you the makings of our bar.  As most of you know, I am a BIG FAN of Ikea, and all of the cabinets in our bar are actually from Ikea.  The entire set cost us $3,400.  Not bad considering our bar is the size of a small kitchen.  The quality is outstanding.  We love them.  Here is a taste of our long journey (apologies on the photo quality, they were all taken with my iPhone.)
 May 2009
July 2009: I had to use the planners at Ikea because they are not compatible with a Mac.  If you have a PC, you can do it at home.
 
November 2009: Searching for countertops.  We decided on a combination of AKRUM Brown/Black and White uppers with glass.
 May 2010:  Ultimately, we decided on Carrara.  As you can see, this piece had to be replaced because it was cut from a different slab.
 September, 2010:  The marble was fixed, but when my tiler hung the tile incorrectly, I almost had a heart attack.  (Can you see the lines?)  They had to come back and dig out individual rocks and reconstruct the wall.
October 2010:  Better.  If I could make one suggestion to Ikea, it would be to sell a stain that matches their cabinets.  As you can see, we added wood paneling to the other side of the bar to match the lower cabinets.  It took me 5 hours and several trips to Benjamin Moore to have a paint mixed that would match it perfectly.  We lightly painted it on the wood paneling, I think it looks great.!
I apologize, these are the only pictures that I have.  Once we get the floors fixed, I will be sure to share more!

10.13.11

Thank You Washington Post!

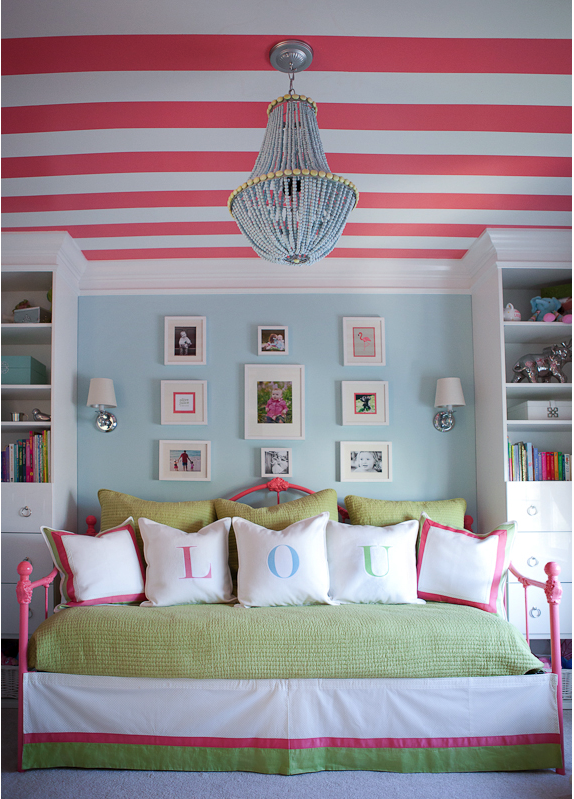
If you are a Washingtonian, be sure to pick up the Washington Post today where you will see a spread on Lou’s room!   
Last month, a friend of mine (Thanks JJ!) sent me an email about a Kid’s Room Contest, and suggested that I enter Lou’s room.  When I went to the site to submit, it didn’t seem to be working, so I figured that my entry didn’t “take.”  Well what a surprise when I received a call last week from Delece Smith-Barrow from the Washington Post that we won!   They came out last Friday to take pictures and Lou had a ball entertaining them in her room.